Introducing Frame War
Submit your best edit, make it into the Top 3, and compete for the monthly Frame War reward. The winner receives cash plus exposure across EarnEdits community channels.

PRODUCT CATEGORIES
Submit your best edit, make it into the Top 3, and compete for the monthly Frame War reward. The winner receives cash plus exposure across EarnEdits community channels.
 Back
Back

 Jul 01, 2026
 Muhammad Sikandar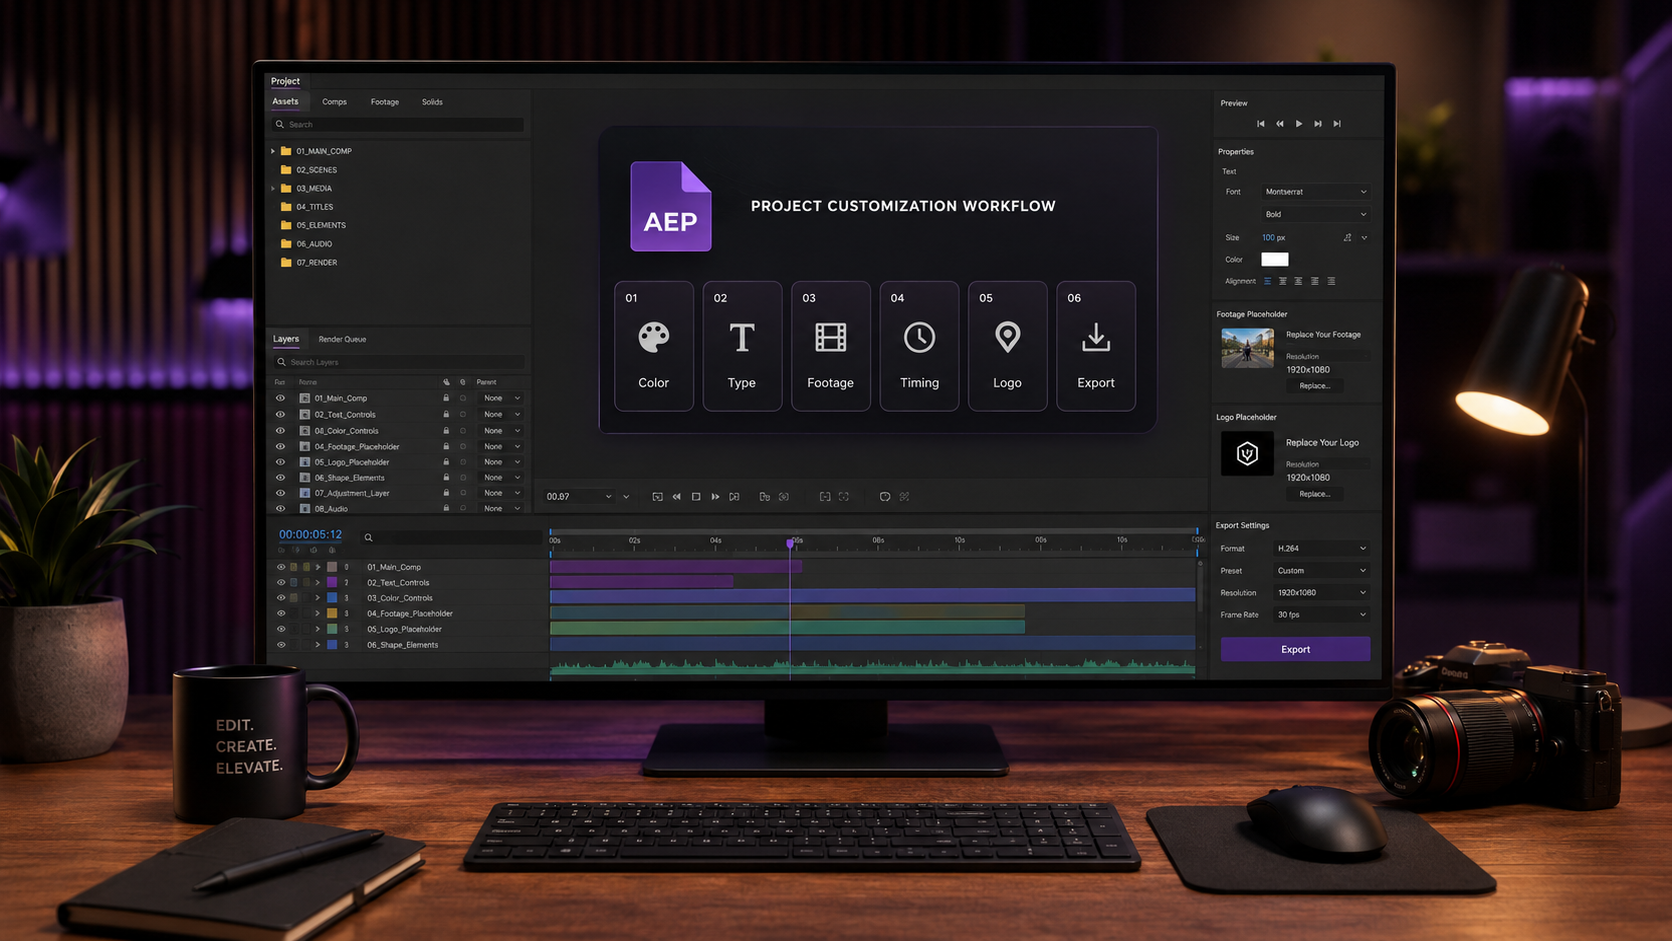
Repurposing a bought After Effects project file means rebuilding the file into custom client output through 6 stages: color systems, typography, footage, re-timing, logo placement, and platform export specs. Video editors who repurpose .aep files cut production time from 8-15 hours of building from scratch to 1-3 hours of focused customization per client. The skill is rebuilding, not delivering. The .aep stays as the working tool. The client receives a finished MP4.
This page covers the full repurposing workflow. The sections include the buyer mental model, the time-savings math, all 6 customization stages, and the mistakes that make repurposed edits look templated.
Repurposing a project file means using a bought .aep as production raw material, not as a deliverable. The editor downloads a proven .aep, rebuilds the visible elements (color, type, footage, audio, logo) for a specific client, then exports finished video. The client receives the export. The source .aep stays with the editor.
This separates two workflows that often get confused. Service providers who deliver source files to clients (agencies handing over working files for in-house future edits) operate one way. Independent editors who use marketplace .aep files as production foundations operate a different way. Buyers from the EarnEdits library of After Effects project files fall into the second category.
The mental model matters because it changes what gets customized. A delivery workflow keeps the .aep clean and documented for the receiving editor. A repurposing workflow customizes the .aep heavily for one client output, then archives it. Different goals, different processes.
A repurposed .aep moves through 6 stages between download and final export. Each stage transforms a different layer of the original file.
Working through all 6 stages in order produces output that looks original, not templated.
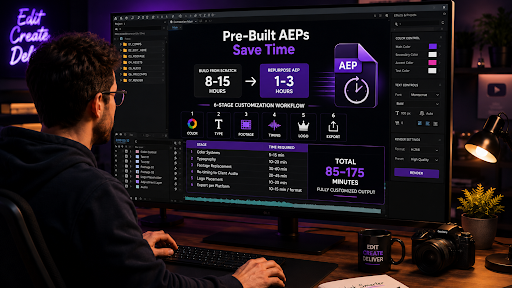
A repurposed .aep cuts a 1080×1920 short-form edit from 8-15 hours of original build time to 1-3 hours of customization. The math compounds across multiple clients per week.
Building a viral-style edit from a blank composition typically requires 8 to 15 hours. Layer setup, keyframe animation, color grading, text choreography, and beat-syncing all take time even for experienced editors. A pre-built .aep handles those steps. The animation logic is already solved.
The repurposing time breaks down across the 6 stages as follows.
| Stage | Time required |
| Color systems | 5-15 minutes |
| Typography | 10-20 minutes |
| Footage replacement | 30-60 minutes |
| Re-timing to client audio | 20-45 minutes |
| Logo placement | 10-20 minutes |
| Export per platform | 10-15 minutes per format |
Total: 85 minutes minimum to 175 minutes for a fully customized output. An editor handling 5 client deliverables per week saves 35 to 60 hours of production time across that week. The savings come from working with pre-built .aep files instead of building from scratch.
That time savings is what makes the marketplace model economically rational for the editor. The .aep purchase covers itself in production hours saved on the first client deliverable. Every customized output after that compounds the return.
Color customization replaces the default palette with the client’s brand colors through the project’s color control panel. A well-organized .aep uses expression-linked color controls. One parameter change propagates across every connected composition.
Find the color control panel in the Project Panel. Well-built .aep files label it as “COLOR_CONTROL,” “Brand Colors,” or similar. The panel exposes 4-8 color swatches that drive every visible element across the timeline. Changing one swatch updates the entire composition.
Brand color matching runs through 3 steps:
Files without expression-linked color controls require manual layer-by-layer color editing, which takes 15-25 minutes longer per project. When evaluating which marketplace .aep files to buy, the presence of a color control panel is one of the strongest indicators of build quality. Beginner-friendly After Effects project files typically include this feature standard.
Typography customization replaces placeholder fonts with the client’s brand typeface in the text-edit compositions. The font swap is the second most visible change after color. The swap makes the edit feel custom even when the underlying motion stays identical.
Locate the text layers in the .aep. Well-organized files label these as “TEXT_EDIT,” “Headline,” “Subtitle,” or similar. Open each text layer in the Character Panel.
Three font sources cover most brand typography matches.
After font installation, swap the placeholder font in the Character Panel font dropdown. Adjust 3 parameters to match the brand’s typographic style:
Brand fonts with significantly different weight characteristics occasionally require minor keyframe adjustments on text scale and position. The text-edit composition holds those keyframes in one place for easy editing.
Footage replacement is the customization stage with the largest visual impact. Done correctly, the output looks nothing like the original .aep. Stock or placeholder footage gets swapped for client-supplied media or topic-relevant clips.
The .aep’s footage layers live in clearly labeled compositions. A typical viral-edit .aep contains 8-12 footage slots. Each slot accepts replacement media without breaking the surrounding animation.
The footage replacement workflow runs through 4 steps:
The Alt/Option drag is the move that preserves the original animation timing on the new footage. Without it, the new clip imports as a fresh layer and loses the keyframe choreography the .aep was built around.
Three footage matching considerations matter beyond the basic replacement step.
Replacing footage well takes 30-60 minutes per project. That time investment is what makes the difference between an output that reads as custom work and one that reads as a recognizable template.
Re-timing keyframes to match the client’s voiceover or music track is the customization that separates a templated-feeling edit from a custom-feeling one. The original .aep ships with timing built around a placeholder audio track. The client’s audio almost never matches that timing exactly.
The re-timing workflow runs through 4 steps:
The graph editor in After Effects exposes the easing curves on each keyframe. Subtle adjustments to ease-in and ease-out curves at beat-aligned points create the locked-in feeling that platform algorithms reward with retention.
Beat-sync matters more than visual sync for short-form social platforms. Reels, TikTok, and Shorts algorithms measure retention and engagement, which correlates strongly with audio-visual rhythm matching. An edit with beats hitting on transitions retains viewers 15-25% longer than an edit with random transition timing on average.
Re-timing typically takes 20-45 minutes depending on the audio length and the number of transitions to align. Shorter clips with fewer transitions take less time. Longer narrative pieces with frequent rhythm changes take longer.
Client logo placement integrates the brand mark into the composition as visual punctuation, not as wallpaper. Most editors over-place logos. The right approach treats the logo as a closing or transitional accent, not a constant presence.
Three logo file formats cover most placement needs.
Logo placement frequency depends on the content type. Three placement rhythms work for most repurposed .aep outputs.
Stacking logos on every shot dilutes the brand impression and signals templated work. Three placements across a 30-second edit creates more brand recall than ten placements across the same duration.
Logo animation in and out beats static placement. A 6-frame fade-in or scale-up at each logo placement adds polish without adding production time.
Export specs deliver platform-specific versions from the same .aep, with different aspect ratios, codecs, and frame rates per platform. A single repurposed .aep often outputs 3-4 deliverables for a multi-platform client campaign.
The 4 most common export configurations for client work are:
| Platform | Resolution | Codec | Frame rate |
| Instagram Reels, TikTok, YouTube Shorts | 1080×1920 | H.264 | 30 fps |
| Instagram feed, Facebook square | 1080×1080 | H.264 | 30 fps |
| YouTube horizontal, web embeds | 1920×1080 | H.264 | 30 fps |
| Broadcast or premium deliverables | 1920×1080 | ProRes 422 HQ | 24 or 25 fps |
Multi-aspect-ratio campaigns require duplicating the main composition for each format. The duplicated composition gets re-framed to fit the new aspect ratio, with key elements (text, logo, hero footage) repositioned for the new canvas.
Filename conventions matter for client handoff. A standard pattern uses clientname_projectname_dimensions_version_status. A full example reads: brandx_q4launch_reel_1080x1920_v01_final.mp4.
After the first export, organize the project files with Collect Files before archiving. The collected folder includes the .aep and every linked asset, which makes future revisions easy if the client requests changes.
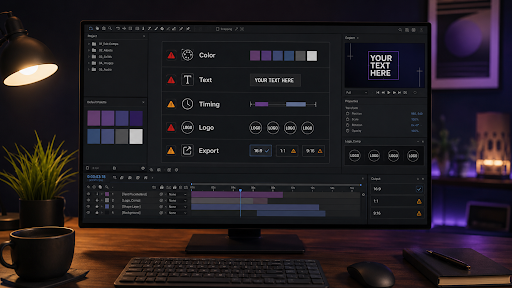
Five repeated mistakes account for most templated-looking client work. Each mistake has a 5-minute fix that prevents the problem.
Skipping color customization is the single biggest tell. The original .aep palette gets recognized by anyone who has seen the source file before. The fix takes 5-15 minutes through the color control panel.
Placeholder text like “Your Headline Here” or “Edit This Text” sometimes ships through to final exports when editors skip the typography stage. The fix is opening every text layer and entering client-specific copy before export.
The .aep’s timing was built around a placeholder audio track. Using that timing with different client audio creates a disconnect viewers feel even if they cannot name it. The fix is the re-timing workflow in Stage 4.
Placing the client’s logo on every shot reads as amateur work. The fix is 3 strategic placements (hook, transition, close) instead of constant presence.
Delivering a single horizontal 1920×1080 file for a campaign that targets Reels, feed, and YouTube wastes the campaign reach. The fix is multi-aspect-ratio exports per the platform table above.
The dedicated guide on common mistakes using After Effects project files breaks down 12 patterns across the entire workflow. The guide covers customization errors beyond the 5 mistakes above.
Yes, when the project file ships with a commercial-use license. Most marketplace licenses cover commercial use in client deliverables but block reselling the source file. Read the license terms on every purchased project file before client delivery to confirm scope.
Repurposing a single project file for one client takes 85 to 175 minutes across all 6 customization stages. Shorter outputs with fewer transitions take less time. Longer narrative pieces with multi-platform exports take longer.
Credit requirements depend on the marketplace license. Most paid licenses do not require attribution in the final output. Free or attribution-required licenses specify the credit format. Check the license file before assuming.
The customization workflow handles 90% of client requests through the 6 stages above. Edits beyond color, type, footage, timing, logo, and export require either layer-level keyframe work or building new compositions inside the .aep. Both are possible because the .aep ships as an open file with full layer access.
The final exported video belongs to the editor and the client per the marketplace license. The source .aep stays under the marketplace license and cannot get resold or redistributed as the editor's original work.
Source file delivery is a contractual decision between the editor and the client, separate from the marketplace license. Many editors charge an additional 15-25% fee for source file delivery. The source file delivery terms get documented in the original quote, not negotiated after the fact.
The full library of repurposable After Effects project files lives in the EarnEdits buyer marketplace. The library covers viral edits, motion graphics, SaaS UI animation, and retro styles. Every file ships as an open .aep with the color controls, text-edit compositions, and labeled footage layers the repurposing workflow depends on.

Explore more guides on After Effects project files and viral editing workflows.
Production-ready edits that teach you how they were built.